By: Julie Christie
This article is about making sure that tack is appropriately fitted and placed on the horse. It is by no means a full guide on how to select or adjust tack, but it highlights some of the more common fitments when putting your tack on the horse.
The Bridle:
The purpose of the bridle is to hold the bit in place and to help the rider control the horse. I am not going to discuss bit selection or variations in bridles/nosebands. If you aren’t sure if your tack is appropriate, you should consult a reputable instructor or trainer.
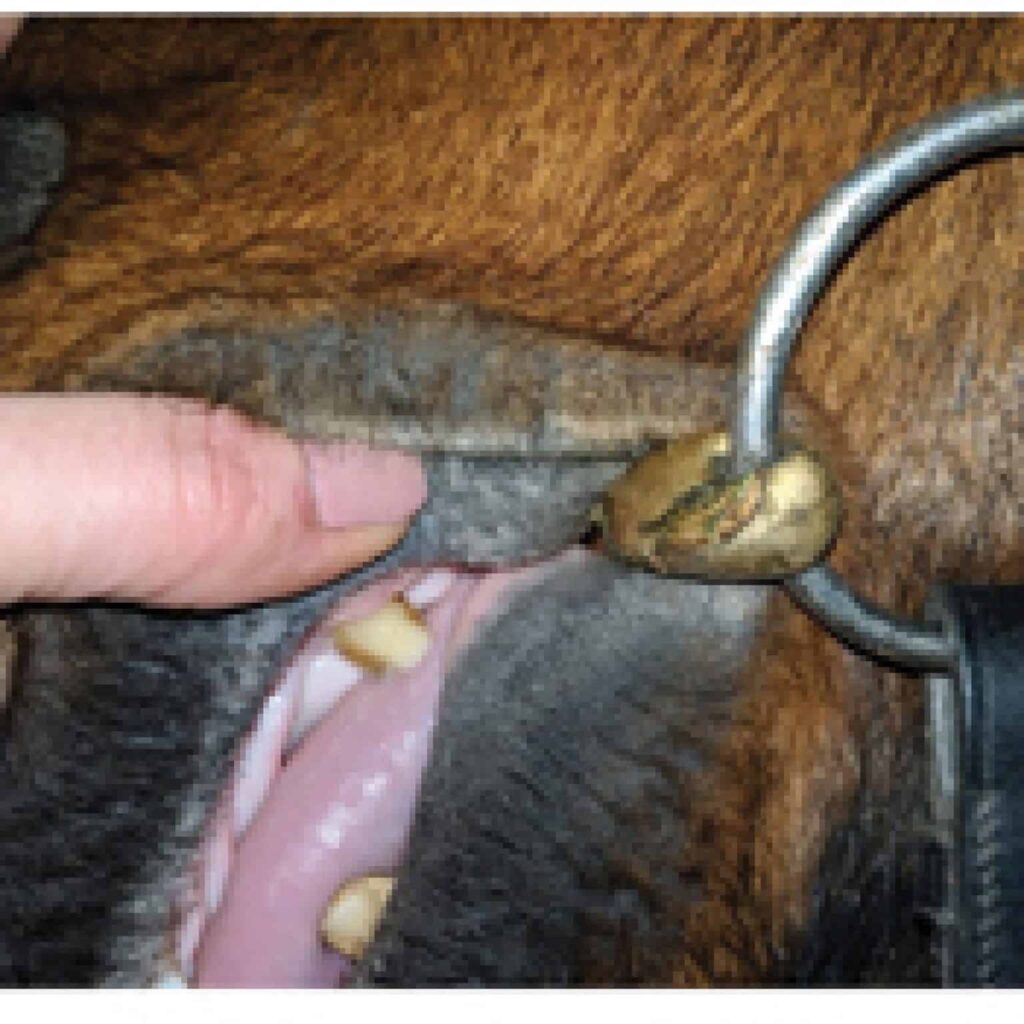
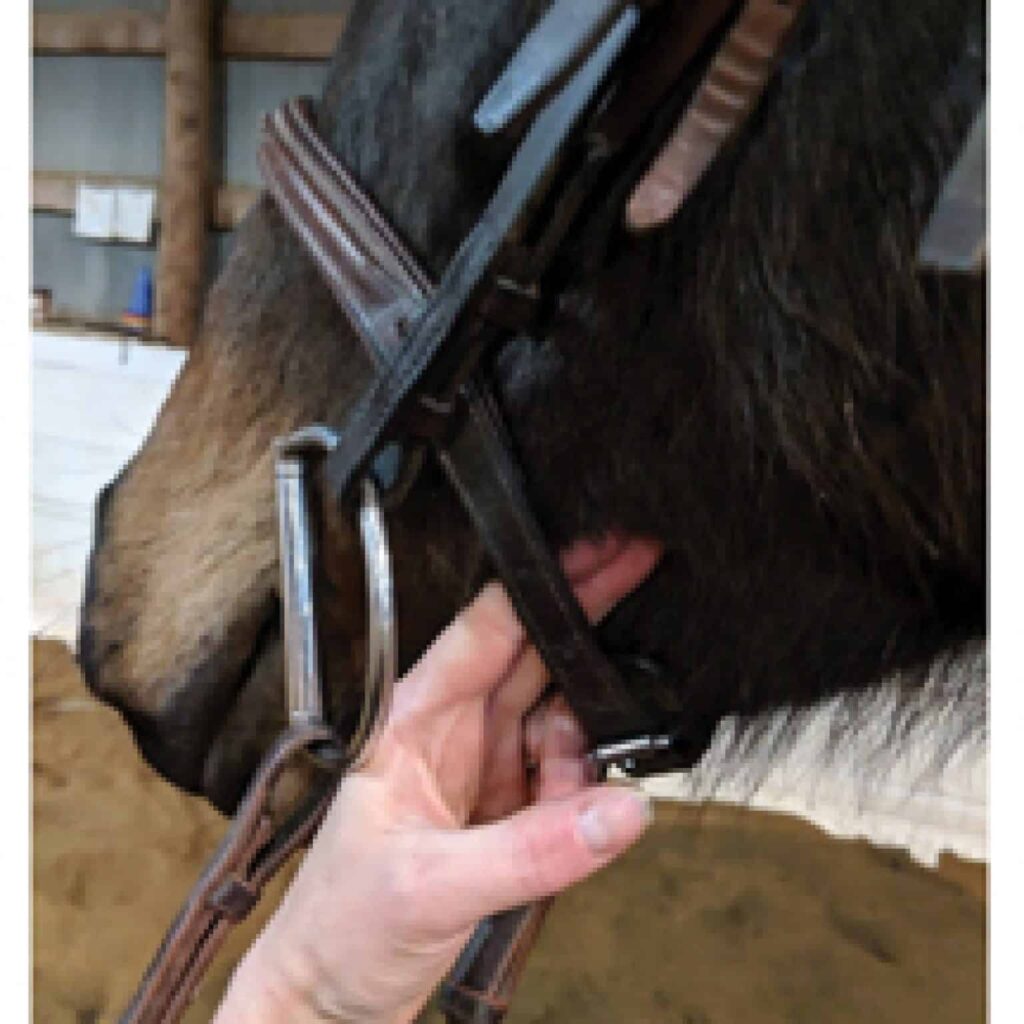
Bit placement is important for the horse’s comfort. Some experts recommend that your adjustment maintains one or two wrinkles in the corners of the lips, while others would say that is too high. The most important rule about bit placement is to avoid the bit touching the teeth. If you’ve ever clanked your teeth on something hard, you know how painful that can be. If you ride a horse with canine teeth, you really ought to examine where the bit is in relation to those teeth. In the picture below, you can see the top canine tooth is quite far back, so the bit needs to be higher to avoid contact with the teeth. Any lower, and the bit would hit the top canine tooth every time the horse relaxes his mouth.
In this image, you can see the top canine tooth is quite far back, so the bit needs to be higher to avoid contact with the teeth. Any lower, and the bit would hit the top canine tooth every time the horse relaxes it’s mouth.
If the bit sits too low in the mouth, the horse might put it’s tongue over it and become irritated by the pressure on the lower tongue. This image shows a bit placed in a comfortable position in the corners of the lips.
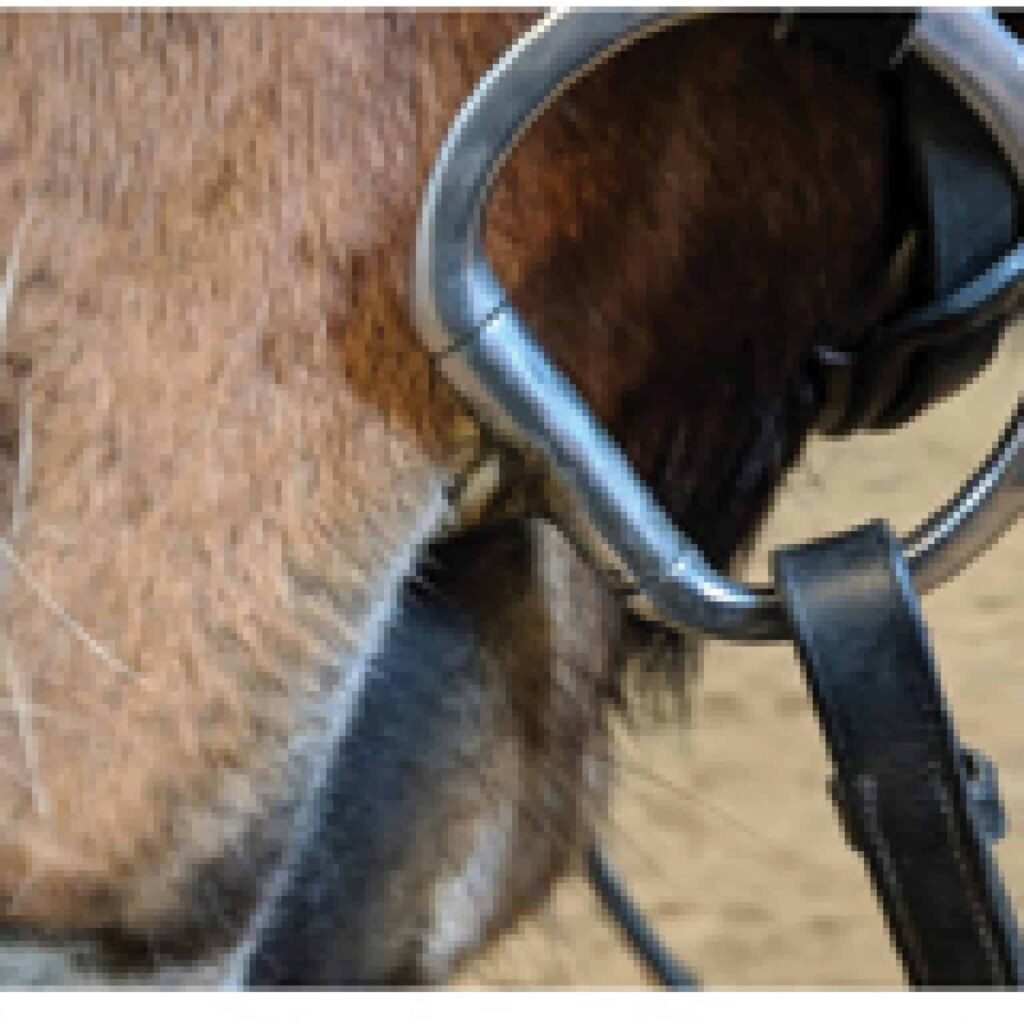
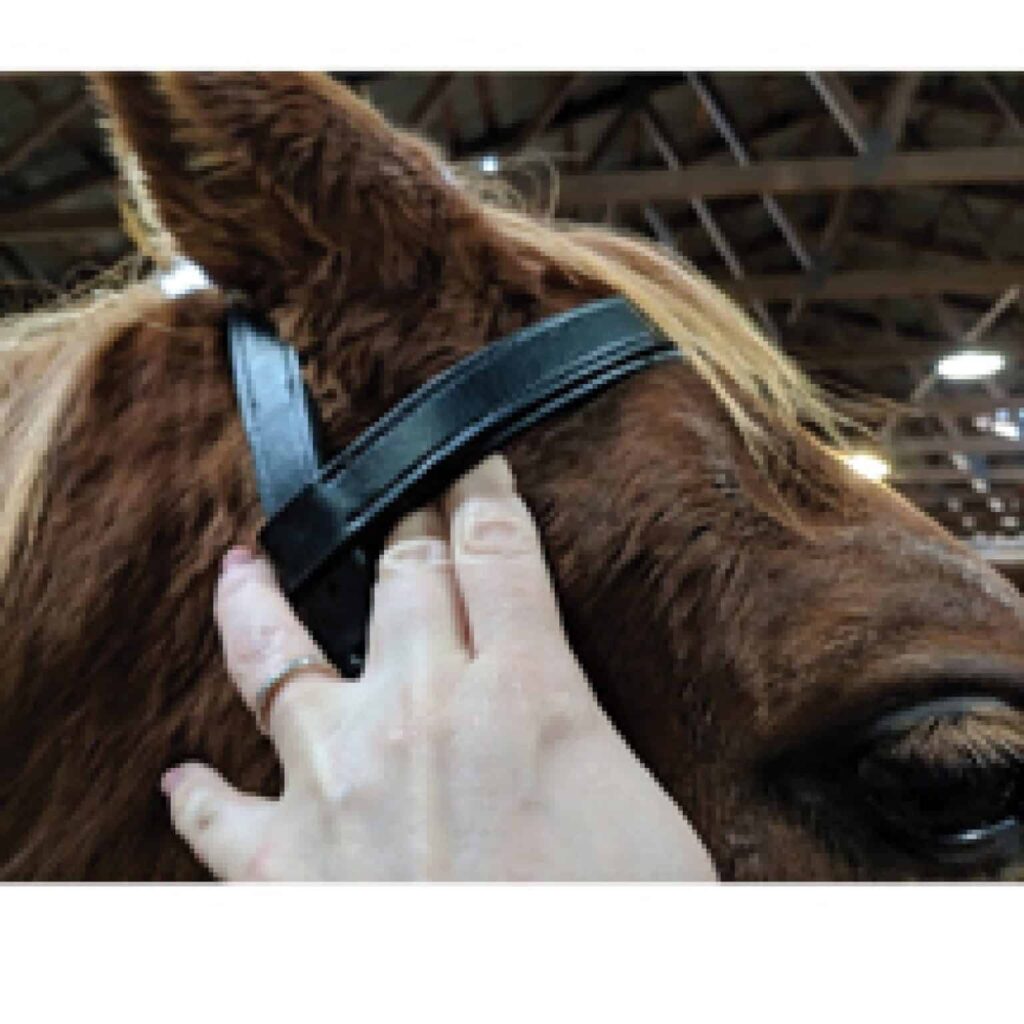
The noseband should be placed between the lips and projecting cheek bone. It should be tight enough so you can fit approximately two fingers underneath the noseband, as seen in this image. Not all bridles have nosebands nor does every situation necessitate one. Some horses are irritated by nosebands, especially if it is too tight or placed too low. If showing in any kind of English riding competition, it is generally required to have a noseband.
The throat latch should be looser than the noseband and should allow a hand width underneath, so the horse does not feel tightness when moving his jaw. This image demonstrates how to measure the hand width.

Browbands are another piece of the bridle that I often see poorly fitted. They can pinch the ears if too tight or are crooked. A slightly too large browband is preferable to one that is too small. In the image here, the browband might be slightly too tight.
In these two images, the right bridle is fitted correctly. On the left is a poorly adjusted and crooked bridle. One of my pet peeves about bridling is when the noseband and/or browband are not straight. Even the extra lengths of leather and not secured in the keepers in the picture on the left.

The Saddle:
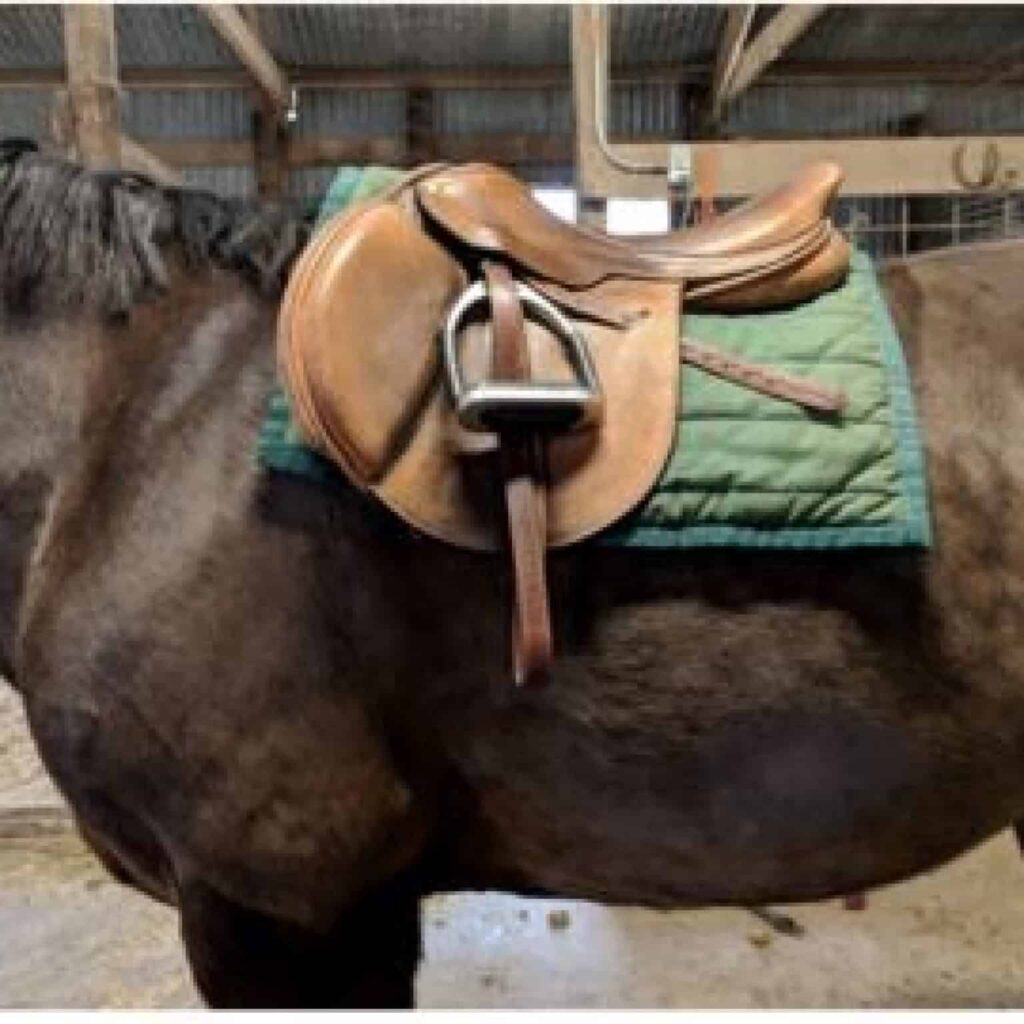
There are many books, videos, and articles about saddle selection and fitting. Even as a very knowledgeable equestrian and professional trainer, I still have a saddle fitter come assess the fit of my saddle a few times per year. I can’t emphasize enough how important the comfort of the saddle is to the horse. When you put your saddle on, it should be placed so that the girth/cinch hangs about 1-4 fingers behind the elbow of the horse. More people seem to put their saddle too far forward than too far back. In the picture below, the saddle has been placed a little too far forward. Note that when the saddle is too far forwards, the cantle (the back of the saddle) usually ends up too low which makes it difficult for the rider to achieve a good leg position.
One easy place to check for major saddle fit issues is at the withers. There should be 2-4 inches between the top of the withers and the saddle. Any pad that you use should be pulled as far up into the gullet of the saddle as possible. You’ll need to check this just before you mount and perhaps even after you warm your horse up.
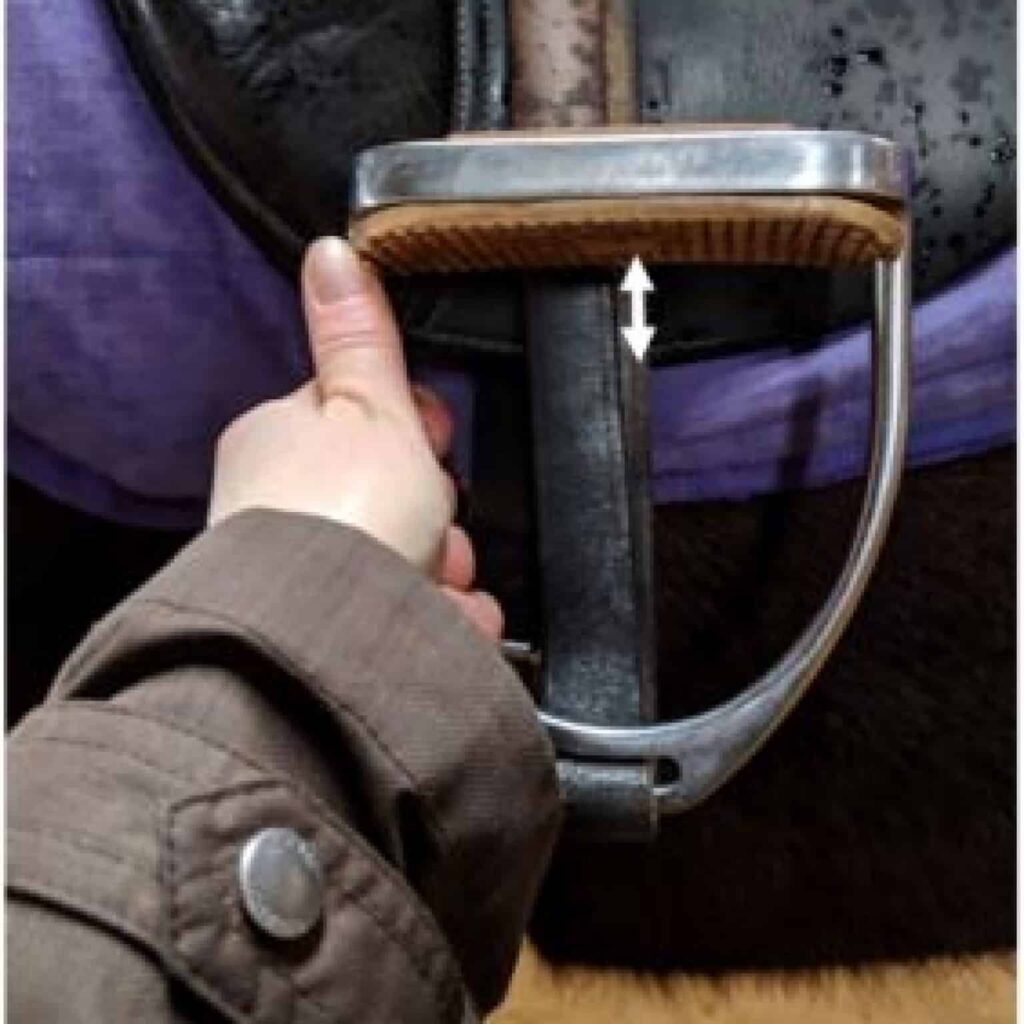
I’ll share a handy little tip on how to know of your stirrups are equal (left and right). Most people stand in front of the horse and eyeball the evenness of the left and right stirrups. However, that doesn’t work if the saddle is off center, the horse is standing crooked, or even if the horse just drops one side of his back. Take the stirrup and fold it up (see picture) so you can get a measure of the distance between the bottom of the flap and the bottom of the stirrup. I sometimes use my fingers as a measure (for example in the picture below, there is about one finger width between the bottom of the saddle flap and the rubber stirrup tread. Now compare to the other side.

Stirrup leathers stretch over time and usually the left one stretches more than the right from mounting. It is a good idea to switch your right and left stirrups out every few weeks so even out the stretching.
If you are unsure about your tack fit, bits, saddles, or if you are getting everything on correctly, you should ask a professional to do an assessment. It doesn’t take long, and it just might help your horse be a more willing partner!