With Equine Chiropractor Dr. Julie Kaufman
I have some friends who once hiked the Appalachian trail. I wondered how long they might last considering they had just purchased new hiking boots, socks and gear.
On the first day my friends reported loving their hiking experience. They expressed feelings of freedom and joy as they described their journey. So many lovely pictures were shared as they expressed a sense of wild exhilaration.
By day three their account of hiking was severely abbreviated. They began writing a lot about foot pain. Now hang on…you might be asking yourself “What does this have to do with my horse’s shoulder?” Soon you will discover that this has EVERYTHING to do with your horse’s shoulders, saddle fit, comfort and ability to stay sound and happy for a long, long, time.
By day five my friends were barely noticing the unspoiled beauty of their trail experience. They now wrote paragraphs about foot pain, blisters and various agonies.
A desperate plan emerged to escape the mountain trail immediately. My hiker friends support team at home felt badly for them, after all they had planned this trip for over a year and so far, they had not made it out of Georgia.
On day six my friends called to report that they had thrown their new hiking shoes into the bushes and ran sock-footed down the mountain to the first road they found. At the bottom of the mountain they flagged down a complete stranger and hitchhiked to the nearest fast food restaurant. Did I mention this was near the spot the movie Deliverance was filmed? Game over!
So what does this have to do with my horse? Everything. Your horse’s “gear” includes saddle, pad, bridle and accessories. Just like the hikers your horse can’t perform in uncomfortable, ill-fitting gear. I have many clients with poor fitting saddles. What is the first thing they change? The pad. Here is where the trouble starts.
Imagine my hiking friends. What would happen if their poor fitting shoes rubbed up some new blisters and they decided to just add bigger socks? Guess what… more pressure, more blisters, more pain. Unknowingly many of us think a thicker pad will solve our problem, especially if it’s a really, really expensive new pad. Does that ever work for tight shoes?
I’m going to show you how to check your horse’s shoulder blade for saddle and pad pressure. I’m going to give you some research backed simple solutions and then I’m going to show you how to restore your horse’s normal shoulder blade range of motion. You can free it from old scar tissue, muscle spasm and “lock-down” from old injuries.
First let’s do some crime scene investigation and look for clues to the offending gear, pads and signs of other injury.
Clues:
- White hairs along saddle, girth or withers. These are old “blisters” folks and they are seriously painful.
- Your horse’s shoulder blades are shaped differently from right to left.
- Your horse’s withers are looking more like a tepee than a mound.
- Your horse’s muscles are uneven or just plain missing.
- When you cinch your saddle, or even bring the saddle within a mile of your horse he looks at you like you’re Hannibal.
- Your saddle is balancing on one or two points instead of touching large areas of your horse’s back and ribs.
Some saddles look more like a clothes pin at the front fork, (lace concho spot) than a comfortable shoe. Place your hand under the front and back bar points at the front pommel contact and back cantle contact, to feel for pressure. You must relieve the pinching with a better pad setup or saddle. Don’t be afraid to get help from your chiropractor or saddle fitter. Don’t wait till your horse runs off the mountain!
What YOU Can Do:
You can do a lot to correct this situation and more importantly to prevent it from happening again. The first step is to check your saddle and pad(s) and to make any changes required there. Professional help is a great idea.
After you’ve changed out your gear, you’ll need to restore your horse’s normal joint range of motion, muscle balance, and balance the nervous system. The first two will get your horse back on track and the nervous system which is like a safety alarm system or a protective parent, will need to be restored to prevent more guarding and spasm from returning.
You can use the JointYoga Method “Steering Wheel” technique below and you may also want to consult with a good chiropractor, acupuncturist, massage therapist or other qualified body worker such as a JointYoga Method practitioner to assist you in getting your horse back to health.
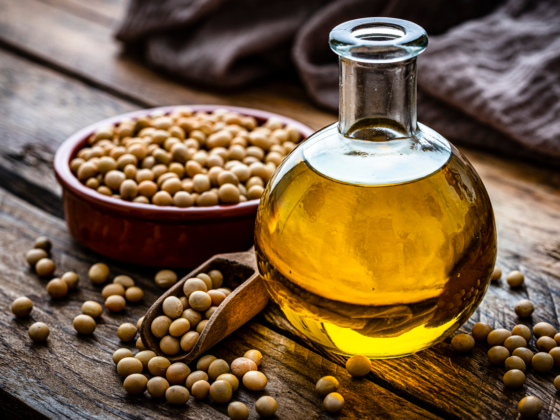
Fact: Research shows that the coiling structure of wool fibers is the best saddle pad material for both English and Western style pads because it offers the most natural “spring” cushion and air exchange. There are many excellent pads on the market but so far nature has us beat on manufacturing the best shock absorbing material. Wool.
Muscle shape can change very quickly. This is because a healthy muscle receives 5 contractions per second from the nerves. When the saddle compresses the muscle, the nervous system shuts off the circuit breaker to protect the muscle from damage.
This JointYoga technique restores nervous system connection allowing the muscle to “come alive” in just minutes.
Steering wheel shoulder release JointYoga Method:
- Start all JointYoga techniques with the 4 B’s:
- Brain at the beach.
- Breathe.
- Land on the area to be worked on like a Butterfly, not a bulldozer,
- Begin your technique breathing in to the stuck or restricted area with about only enough pressure to lift 2 quarters, for 10 breath cycles breathing “2 quarters” pressure into the stuck area, breath out and release to neutral with no pressure.
- Locate your horse’s shoulder blade and imagine a steering wheel laying over that bone as pictured. Place one hand on the top of the blade and the other hand near the shoulder joint at the bottom of the wheel.
- Lightly “steer” right and left as if holding a steering wheel to assess which direction the “steering wheel” is not moving. For example if you were turning the wheel right and it locked more than to the left this would be “steering wheel” You will breathe in and lightly turn to the right when we get to the release.
- Release your hands. Practice the four B’s that are the foundation of all JointYoga Method Get your brain at the beach. Why? Because touch is honest. What you think, your horse feels. Imagine if I was really happy and touched your shoulder. Now imagine if I just had a fight with someone and I touched your shoulder. That touch is something else! Brain at the beach is more important than your technique so always start by going there! Brain at the beach can be a forest, color, song, picture or other happy place. Find yours.
- Your touch is sticky and unpleasant when you hold your breath. Be aware and keep breathing.
- Land on the “steering wheel” shoulder blade like a butterfly. You need not be touching with more pressure than it takes to lift two quarters.
- As you inhale, steer into the stuck direction. Right if it is moving less right, and left is it is moving less left but not both. As you exhale, go back to zero pressure and a neutral hand position. Repeat by breathing in to the stuck area and out to neutral. Repeat 10 times.
- Release your hands in slow motion. Move off of the shoulder blade like a butterfly! This is critical. You have affected the nervous system, muscles and joints. Let the horse’s body adjust.
- Repeat steering wheel 1-2 times a week only. Let your horse process the treatment in between.
Warning: One of my clients thought the JointYoga was too “light” to cause any problems. I recommended she work on her dog for 10 breath cycles but she did it for 10 minutes. The dog couldn’t walk for a day! JointYoga is powerful so don’t overdose your horse! Less is more.
We look forward to hearing about your results and sharing more safe techniques to make you and your horse more comfortable and flexible. More at www.ChiropracticForAnimals.net and www.facebook.com/JointYoga